Pages

Tuesday, June 24, 2014

To Bee or not to Bee, what was the question?


Before I did some research the only visions of a quilting bee floating in my head were of the ladies at church.  They still to this day spend a whole afternoon once a week in the basement of the church working on a quilt, it will take them all year to finish it. This bee is mostly chit chat and lunch.

About 6 months ago I decided I have made plenty of quilts for myself, I have a couple I want to do eventually but no real NEED.   So maybe I could make some for charity now, if you are like me every quilt you make is personal and you don't want to give them up.  The problem is I couldn't justify to myself the cost of making a beautiful quilt on my retirement income to give away.  I was aware others in my guild belong to virtual bees and some are specifically for charity, that's what I wanted.  I now belong to 4 virtual bees and I love it.  To keep on track I basically make each of the Bees blocks as soon as they are posted and get them in the mail.  I know I wont fall behind because other than a challenge piece I need to quilt I have nothing else waiting my attention.

A Virtual Bee is done completely via social media and/or email, you mail the blocks to the monthly host or queen.  Each month one member is "Queen" and everyone makes blocks for her.  When it's your turn to be Queen you pick the pattern you want, make a sample block and send every member the information, some use email, flickr and Instagram.  Everyone including the queen make 1 (or 2) quilt blocks and mail them to the queen.  Its a great way to do a block or design you wouldn't normally do, to push you out of your comfort zone.  I have also mixed colors I wouldn't normally because it was requested and they came out beautiful.

Only one of my Bees is set up as a charitable bee but I  have assigned a charity myself to the others for my quilts.  When it's my turn I will donate my quilt instead of keeping it. I know I will give one to my church's annual auction, Project Linus and Wrap Them In Love is for the Charity Bee.  I still have one more to decide on, do you know any worthy charity in need of a quilt?

If you are interested in joining a bee it's a great way to improve your skills making blocks you wouldn't normally pick for yourself and get to know some fantastic ladies.

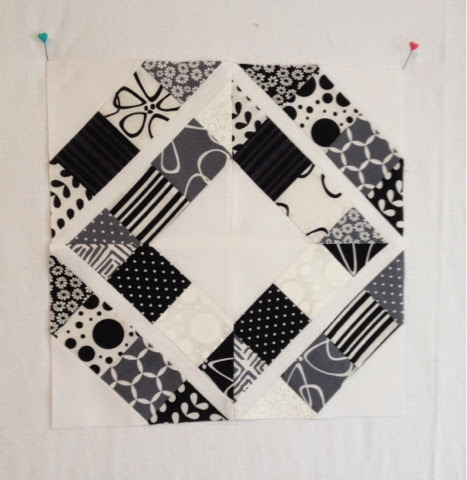
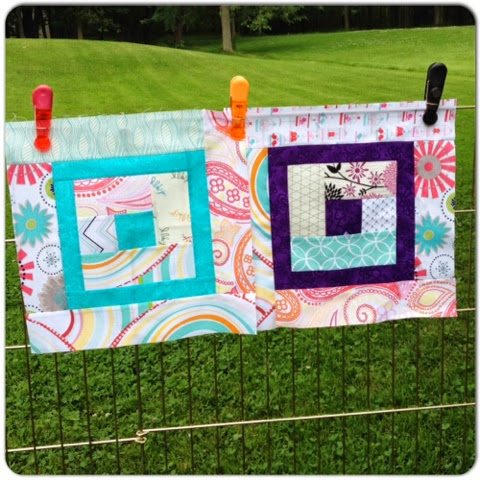
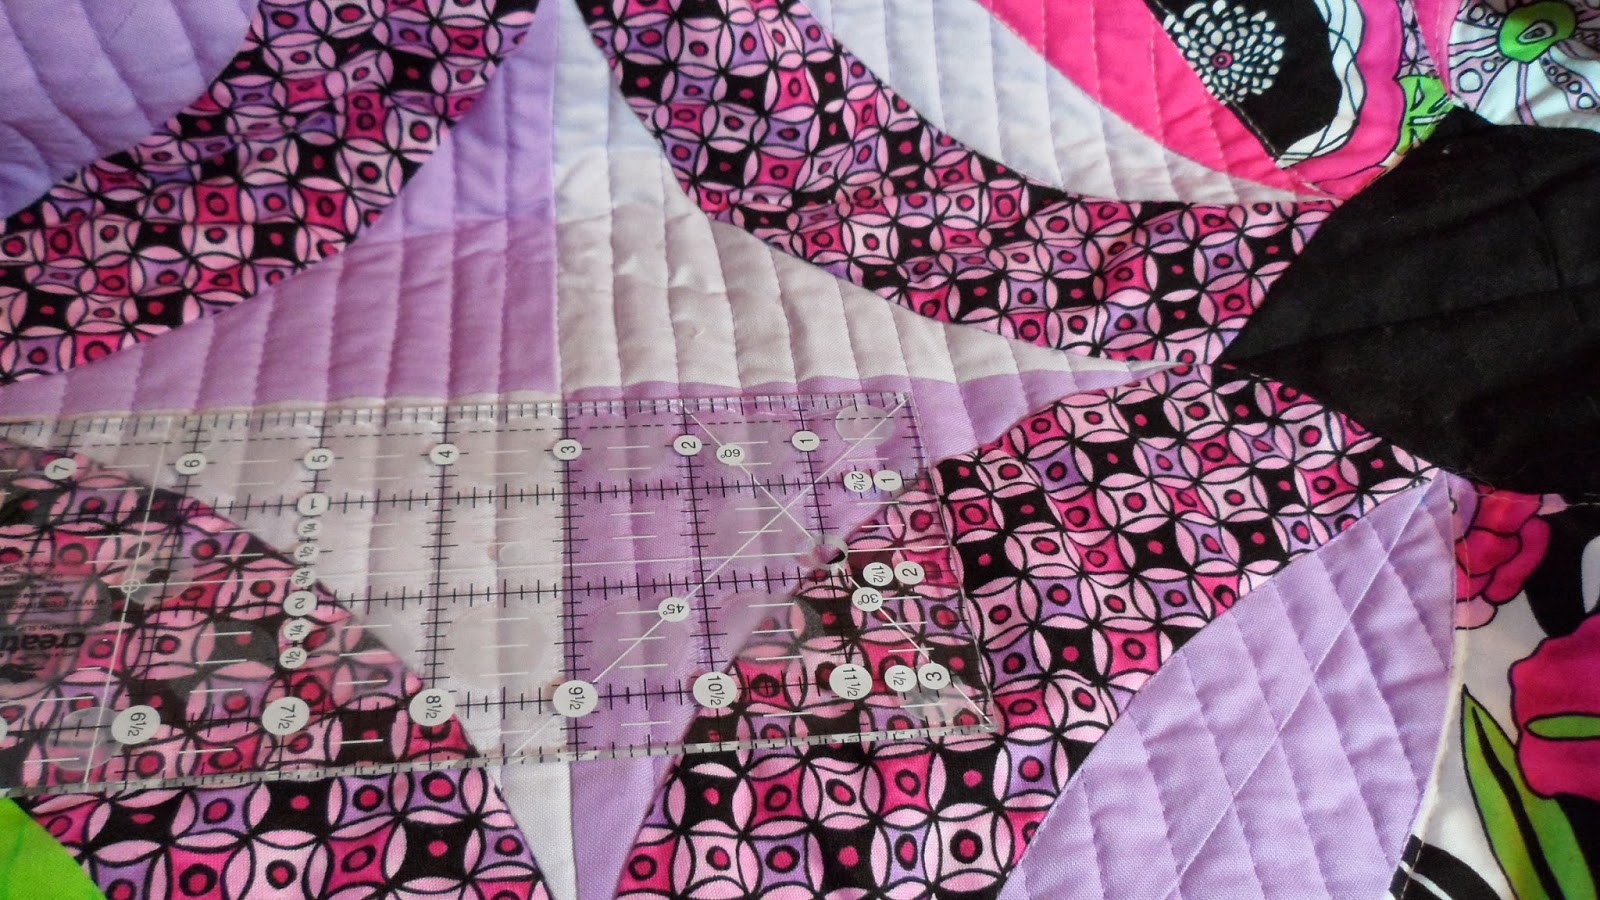
Some of the blocks I have made over the last few months.


Wednesday, June 18, 2014

Finding a better way

Sorry I've been missing for a bit, I've been working on my Michael Miller Challenge for a month now.  Although I'm not ready to show the whole quilt yet, (soon I promise) when I decided to do inset corners I had to find a better way.

Normally when you do corner  triangles you would start with a square, stitch diagonally from point to point and cut off the excess leaving a quarter inch selvage.  Press to set the seam and then press open, I did this for the first one.  Then I measured the corner I cut off so I could make my ruler the template for all the other corners.


I figured if my first step was to cut off that corner I could use scrap for my insets not full squares.  No more wasting half or worrying about the square moving while I sew.  I just used a sticky note, some tape and a clear ruler ~ ta-da!


Press the scraps and use the ruler to cut off all the overage, save anything big enough to use again


So much easier with very little waste, now if I only had a use for about 100 tiny white triangles

 
Linking up with my Wednesday favorite blogs Freshly Pieced and Sew Fresh Quilts

Thursday, June 5, 2014

I loved doing the binding

This quilt has taken about 6 months to complete.  Once I made the final design decision everything came together pretty fast.  I needed to decide if I would add a black border before putting on the binding?  I had decided already I wanted the pink stripe for the binding, if I didn't do a border my thought was it would just look like all the colors ran together. 

The black would add a stop to the edge of the quilt then I remembered a recent blog post about a binding with two colors, it's just what the quilt needed. I used this tutorial just as printed, it was perfect and easy to do. The tutorial is Susie's Magic Binding found on the blog Aunt Marti's 52 Quilts Twelve Fourteen The original tutorial is fantastic so follow it step by step.  I am showing what I did below to make it special for my quilt. 


Sewing the stripe down the middle of the black to keep the pattern continuous
Normally I would cut the binding strips 2 1/2" wide, for this method the main color is cut 1 1/2" wide (pink stripe)


The accent color (black) is cut 1 3/4" wide and sewn into one long strip

Press

Then sew them side by side creating a 2 3/4" wide piece, fold it in half with the accent piece showing just a little.  Pressing at this stage is VERY important

Fold and Press Again
Instead of stitching the binding to the front and hand stitching it to the back this method is opposite stitching it to the back and machine stitching to the front.  So much easier

 
Just a little black stopper is just what it needed
 

And TaDa the quilt is basically all done and I love it


Time for the close up

 
This stripe with a touch of black worked out perfectly.  Now I just need to finish the label and it is a special one, I will post that later.
 
 
6 Flavors of Aurifil my favorite thread


Time to sew,
Pam

Tuesday, June 3, 2014

Walking Foot Quilting

When I first started quilting I was determined not to send my quilts out for top stitching, so my method was to use my walking foot.  There were two reasons, cost of course and it didn't feel like mine anymore if someone else finished the best part.  I did all of them this way until last summer when I purchased the Tiara. 

The reason for this post came about when a friend didn't realize the width of a walking foot was one inch.  She just knew she was told to buy it and the three layers of the quilt sandwich didn't shift when she used it which is a good thing.

 
This is my walking foot for the Viking Ruby

 
What makes the walking foot extra special are the teeth that look like another set of feed dogs on the  bottom of the foot
 
 
Make sure the extended "C" part of the foot goes around your needle screw so it works with the movement of the needle

I started with one straight line~ from the outside edge to the center needle is 1/2"

 
Once you stitch the 1/2" lines they will fall on the green dots, the center stitch will make the 1/4" line.  Once the 1/4" line is stitched they will fall on the yellow dots and stitching down the center will create the last 1/8" line


This is matchstick quilting

 
My favorite is the 1/2" straight line quilting or random width straight lines.  Do you have a favorite. 

Connecting with Sew Fresh Quilts

 
The New Quilt Blogger Blog Hop starts this week so use the button at the top of my sidebar to check it out.  (I will be featured in July)