Pages

Tuesday, December 31, 2013

One last post

of the last item I completed this year 


You may recognize this as the pillow that goes with the surprise quilt I made, it's ready to deliver.  I did a few things different from the last pillow I made 

  1)  I rounded the corners 


  2) Changed up the back with stripes 


  3) Made a pocket with a small strip of Velcro 

  
and  made my own pillow insert out of fleece to make it soft.  I added 4 tack marks so the pillow isn't round and puffy.  This is what I like so hopefully the recipient does too. 


The stitching matches the quilt, I will definitely do another pillow.  This was fun and completes the look of the set.

See you next year!

Monday, December 30, 2013

When I look over 2013

Reviewing all the items I have worked on, completed and are now in use, I had a really good year!  As you all know by now I have been sewing forever, but the addition of quilting for me has only been about a year and a half.

I have learned so much this year from books, TV, computer classes, YouTube, hands on classes and fellow quilters/sew pals.  When I'm not actually working on a project I am on my Tiara with scrap, practice, practice, practice.

In review I have completed
2 king size quilts
1 queen size quilt
4 full size quilts
7 baby / lap quilts
1 doll quilt
3 Stuffed animals
10 marshmallow peeps
28 place mats
8 mug rugs
3 pillow cases
1 pillow
1 purse
4 tote bags
2 med zipper cases
12 wallet zipper cases
14 puppy foo foo scarfs
2 Christmas collars
1 Beach cover up
1 Quilted Name tag
1 Ironing board cover
And a flag for Boston


Current UFOs
1 Yellow, Gray and White quilt I am taking my time on it's not in a pattern book, I am making it my own.  Technically it's a work in progress, not an unfinished object.  

Projects on deck- a Riley Blake challenge for MQG, to be fair I just got the fabrics 2 weeks ago.  Lastly a feather quilt designed by Anna Maria Horner.  Our WNY MQG as a group we are each making 15 blocks to swap of which one we will keep and one will be made into a quilt to be donated to charity.  On this one I have questions I think will be clear after our January meeting so I will wait.

Guess I was busy this year, good thing I'm retired 


Saturday, December 28, 2013

Surprises

More than a few months ago I was given a very large bag of fabric to do with as I like.  The owner had selected all of the needed fabrics for a pattern she wanted to do for her room.  Most of them were cut 3 1/2" wide by the length of the material, I wasn't sure what the pattern looked like but I loved the 33 different prints
Bag o fabric

Unfortunately the sewing machine she was going to use wasn't working properly, the thought of making her first quilt was no longer of interest.  She had talked about doing this quilt for months so I assumed letting go was a big decision, it would be for me. 

As soon as she left the room I told my sister I wanted to make it for her and I would complete it in time for Christmas 6 months away.  Maybe seeing it completed would encourage her to try again someday with my encouragement and help.

start of the block

I started the first 2 rows using a fence rail and then was given the pattern of what it was planned to be, an Amy Butler design.  I was able to download it free off line, looking at it I then created my own pattern starting with the fence rail and then using additional cuts creating a pie shape to each square.  I liked it and hoped the recipient would too.  It was a creation of 2 patterns, totally unique just like the lovely girl it was going to.

using the design wall to mix up the fabrics 

I made it queen size adding a pocket on the back where I included a note to the recipient.  She loved it and her fabric selections brought out the lime green of her bedroom walls.


ready to deliver


Now that Christmas has passed I can print this post ~ Merry Christmas, I hope you received something you thought was wonderful too!


in progress

surprises yet to come there is still a pillow in the works :)

Thursday, December 19, 2013

Metallic thread


I wanted to make a runner for my cocktail table using fabric I purchased a few months ago.  The pattern and quilting I kept simple so I could use metallic thread.  


When I purchased the silver, gold and copper metallic thread my sewing machine dealer gave me some tips to use it.  She suggested letting the thread unwind loosely placing it next to the machine without the cap and using the thread extension for large cones. 


My machine prefers the  thread on top and the bobbin be the same weight,  it took a few changes but I ended up using the embroidery filament thread. 


Prior to quilting I checked my machine to see which needle is suggested to use and played with the thread on scrap until I was happy with the results.  


I expected a lot of breakage due to the thin nature of metallic thread.  I was pleasantly surprised I only had two breaks and one was my fault catching the overage of the fabric on the thread as I turned it. 


I enjoyed making this one so much I finished it by tracing the glass from the cocktail table like a template and using a small width binding to keep the curves crisp.  I'm happy with the finished results.

Monday, December 9, 2013

Christmas Gathering

UAs you may know by now I hate table cloths unless it's on a buffet.  I prefer placemats, when you have one with a spill you don't loose the entire table covering.  I will be using my Christmas plates, ( no paper plates here) silverware and placemats.


Christmas placemats for me MUST be in real reds, green-green, snowy white and even silver or gold. When I found this fabric line from _________ I knew it was the one I wanted.  I envisioned fussy cut squares so I picked fabrics to match.  As I made the first one I took the opportunity to quilt them each differently.  Good way to try different patterns on a small scale.

I will be making a full dinner on Tuesday, turkey with all the trimmings.  Wednesday I do breakfast after presents and we are doing an afternoon dinner gathering with my family, this will allow my daughter to visit with everyone without spending her few days home in a car trying to see everyone.


For as long as I've been married we have traveled on Christmas Eve or Christmas, I am so excited to host this years Christmas and relax on Christmas Eve.


Monday, December 2, 2013

Hallmark please stop

Hallmark please stop this series!  
Fireplace Pre-decoration
My husband is a Hallmark collector, he started the series Shop's & House's 30 years ago.  With the addition of specials on top of the annual release there are now 36.  This first became a problem about 10 years ago when the series exceeded my fireplace mantel.  To fix it I started putting the houses on the wreath.  When that wasn't enough I created levels so I could double them up.


  Last year 2 were released and again this year another 2, come on Hallmark enough already.


This year hubby cut some scrap 4" longer and 3" wider than the mantel to give me more room.  The scrap is made of MDF so I can't staple into it or use tape. 

 A simple slip stitch secured the white cotton batting nicely. To create multiple levels I also covered 5 smaller pieces of 2 x 4 and 2 x 6.  Stacking them allowed all of the shops to be seen. 


Each year we put up several trees, yes plenty of ornaments to go around. The mantel is my favorite place for the houses and shops, I'm glad working together we could solve the problem and keep them here.  
I still want Hallmark to stop this series please, that and Frosty Friends ~another that has gone on too long.

Friday, November 29, 2013

Fire Pit


It's that sad time of year where we have to put away the garden ornaments, trim back the berry bushes and cover the fire pit for the season

We built our own fire pit a few years ago and it's the best part of summer nights.  When we first got it I also purchased a cover at the cost of $40+ to keep it from filling with water when it rained.  Since it was basically a plastic cover with a fabric lining it has since cracked and is not doing its job.

I decided it looked easy enough, needs to be round, at least 46" and 12" tall, Easy peazy! So I used a pencil and string to make my perfect circle with a 12" strip long enough to go around the circle.  

Pinning
I used rubberized fabric (used to protect children's bed sheets in my case puppy when she was sick) nylon fabric and a parachute clip.  Since I already had the rubberized fabric the whole thing cost about $9 and an hour of my time.

Ready to sew

The only step that doesn't show is I added 4"  to the side, the top fit the top even and angeled out, this makes it easy to put on.  (Picture adding a piece the shape of a triangle). The parachute clip clinches in this extra fabric and keeps it from blowing off.  Any sewing I did on the nylon I backed that area with fabric to make it stronger.  

Parachute Clip 
Since we like to keep the cooled ashes in the pit during the season for a hotter fire bed I also drape a layer of used plastic from my garden to make sure it stays dry.

I think it looks good and certainly does the job!

Fire Pit Covered

Thursday, November 21, 2013

WSS What?

That would be Water Soluble Stabilizer, one of the materials used in machine embroidery that can NOT be omitted if the item has no opening to remove it once complete.

As posted last week I am working on zipper pouches, several of them. The problem is the most appropriate hoop is much too big and would waste expensive WSS.  So I came up with this solution


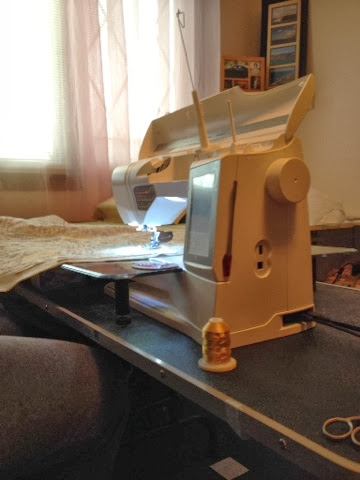
Using fabric I cut an opening an inch larger than the design and marked horizontal and vertical lines, these lines match the ones on my hoop.  A few pins and I sewed the stabilizer in with large stitches.


With this method the surface was strong, taking the piece on and off the machine after each step adding materials as needed.


The last step prior to turning the pouch right side out is cutting off all the excess 1/4" all the way around.   On the hoop WSS easily tears away removing all but the stitches, after doing 10 pouches the build up from sewing in the WSS was too much so I used a seam ripper on my template to make a couple breaks in the stitches and removed them.  I was back in business to make more


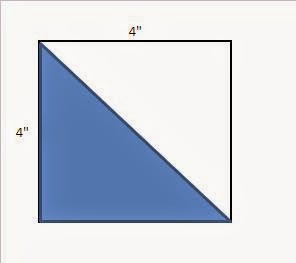
Before this method the size WSS piece needed to cover the hoop and stay secure was 12" x 14"  Now that I can sew it in, I cut the WSS 6" x 8" for this 3" x 4" zipper pouch.  The savings transfers to the cost I need to charge on etsy.  Win Win!

(All my pouches finish without exposed seams thanks to Embroidery Gardens digital pattern (EmbroideryGarden.com) are washable on cold and dry on a low setting.  This removes the WSS and any spray used)


Tuesday, November 12, 2013

Organized

Recently my computer died when infected with a Trojan virus, my son was able to kill it and restore my files.  While it was gone I realized all the embroidery files I would have lost if he wasn't so good at his job.  

Upon its return the first thing I did was copy them to a CD and started printing all my patterns I had purchased.  To do this double sided I purchased a light card stock and several binders on sale for $1.

Once printed I organized them in each binder by the type of file.  The new post-it label tabs worked perfectly separating the files


 I decided to use the clear label maker instead of handwriting the tabs


When I stitch embroidery 
patterns with multiple pieces and steps I make paper strips with the size fabric needed and alphabetize them by step.  This way I can cut my pieces while watching TV, keep them organized and cut the same pattern several times.  

 I pin them to the fabric and save them with the pattern by using pocket folder inserts.

This pattern I printed in 4 colors so I could make them one after another while my machine was in embroidery mode.

Do you do something similar?

Wednesday, November 6, 2013

Bring on Fall

My favorite time of year is the Fall, not too warm, not too cool and the changing leaves in Western New York are amazing. After reading my daughters blog today Wilde in the Kitchen she feels the same way, it's a family thing.  

I loved the fall weather so much I planned my wedding for October.  Picking the day was tricky because my childhood home had a maple tree that had the best colors on the street for a few weeks each fall.  My goal was to pick a day that showed the tree at its peak of color.  We picked the third weekend, I decided on Friday so my wedding didn't land on Sweetest Day a  ~ Hallmark Holiday.

My niece Lisa and I
I knew I wanted to make my wedding gown and what I wanted it to look like, keep in mind this was the 70's and this style was very popular.  I also made my little sisters gown and several items for that special day.  I loved sewing and made the time to create exactly what I wanted even then.   


Patty Sue, Pam, Kathy, Me, Linda, Aileen & Lisa
All of the fabric for the girls dresses are exactly the same, the color change was possible by changing the dress lining color, kinda fun huh. I searched all over for fabric finding it in Buffalo at a little in home shop.

I still have my veil, gown and the bouquet.  I don't expect my daughter to wear it, to begin with she is 2-3 sizes smaller than this dress and the fabric was satin and chiffon.  When Miss V was born I used the extra fabric from my dress for her christening gown, this fulfilled my wish for her to wear my wedding dress and I loved making it.  I spent a week before this posting to try and find pictures of her christening dress, it seems I need to check with my sisters as I have no pictures from that day.

The weekend before my wedding the tree was just starting to turn, still mostly green.  The weekend after all the leaves had fallen after a strong night of windy weather.  I think we picked the perfect weekend, what do you think?


Monday, October 21, 2013

Chevron

Over the last month or so I have been working on items to reopen my ETSY shop.  I have almost completed the personal projects I had piling up, totes, place mats, shower gifts for family members and a king size quilt for myself. Several of these I have already posted on a previous blog. I still have one more project started but it's a secret shhhhhh, it is a holiday gift for a family member. 
My King Size Quilt


The chevron is my go to quilt for baby's as of late. Using a minimum of 8 different printed fabrics and one solid I am creating beautiful quilts.  Using this old pattern with a more modern top stitching the double folded binding is turned all to the back side.  What this does is give the front a cleaner modern look and doesn't cut off the ends of the chevron blocks. I have a confession- am crazy fanatical about 2 things in the quilting process 1) pressing every seam after every stitch and 2) squaring my blocks. I have reviewed several ways to do my blocks, after many different methods I now make 8 chevron squares at a time.  


Placing two 9 x 9" squares right sides together place an X with erasable marker corner to corner.


Erasable Marker Lines


Start stitching from one corner using this line as if it is the edge of the fabric, stitch 1/4" away.  When you get to the end turn it around and do the other side of this same line.  Repeat in the other corner.
1/4" Stitching on each side of the line

After completing the stitching, cut 4 lines to create 8 blocks.  Cut down the middle top to bottom then across the middle from side to side.  Then cut on the erasable lines and you will have 8 doubled triangles. 
Cut into 8 at the dotted line 

Press each triangle open and square to 4" x 4"
Open block and press seam to the darker fabric
Square block to 4" x 4"

If you square every block before putting it together everything lines up perfectly.  It's such a great pleasure and feeling to create a beautiful baby quilt that will be used, washed, played with and still be around for many years after they've grown.